万有引力定律的证明实验
本教程本站原载,转载请注明出处:网页教学网
首先看一下效果吧!鼠标可以拖拽小球到别的位置然后放开,或用鼠标把小球扔了:
[附件:源文件下载]
制作过程说明:
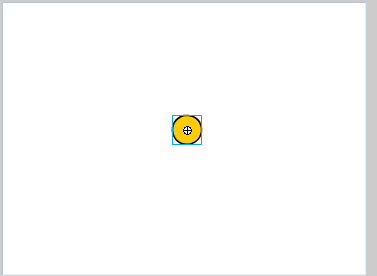
1.设置场景,首先我们建立一个400 x 300的文档,然后在文档的中央位置绘制一个大小适宜的正圆。如下图所示:

2.首先我们先初始化几个变量,他们分别是:gravity, restitution 和 friction,并且把下面的代码添加到时间轴的第一桢:
var gravity:Number = 1.2;
var restitution:Number = 0.6;
var friction:Number = 0.9;
stop();
3.然后我们对小球进行设置,首先把小求转变为一个组件,类型选择影片剪辑,名称为:Ball_MC。然后为这个影片剪辑实例添加如下代码:
onClipEvent(load) {
var vel:Object = { x: 0, y: 0 };
var pos:Object = { x: _x, y: _y };
var old:Object = { x: _x, y: _y };
var radius:Number = this._width / 2;
var movie:Object = { width: 400, height: 300 };
var dragging:Boolean = false;
}
4.我们添加如下代码来控制小球的移动
onClipEvent(enterFrame) {
vel.y += _root.gravity;
pos.x += vel.x;
pos.y += vel.y;
// 现在来更新小球的实际位置...
_x = pos.x;
_y = pos.y;
}
5.当小球在按钮的范围,被拖拽并松开时,小球就可以蹦了!加上如下代码:
// Has the ball left the bottom of the stage?...
if( pos.y + radius > movie.height ) {
pos.y = movie.height - radius;
vel.y *= -_root.restitution;
}
6.为了让鼠标的动作更加真实,比如你可以用鼠标任意拖拽小球,我们要稍微修改一下Ball_MC元件。在舞台上选择小球实例,然后按Ctrl+E来编辑实例,并且设置为黄色,然后转变为一个按钮元件Ball_Button,然后给按钮添加如下代码:
on(press){
startDrag(this,false,16,16,384,284);
dragging = true;
}
on(release, releaseOutside){
stopDrag();
dragging = false;
}
为了能让动画更加具体我们需要设置一个变量dragging来保持小球被拖拽的轨迹,代码如下:
onClipEvent(enterFrame) {
if(!dragging) {
// Actions to apply gravity here...
}
}
为了使动画更加真实,我们需要增加上述的代码的功能,以使我们能在舞台上任意拖拽并扔小球。
onClipEvent(enterFrame) {
if(!dragging) {
// Actions to apply gravity here...
} else {
old.x = pos.x;
old.y = pos.y;
pos.x = _x;
pos.y = _y;
vel.x = ( pos.x - old.x ) / 2;
vel.y = ( pos.y - old.y ) / 2;
}
}
7.另外我们还有2个问题要解决:(1).我们扔小球到左边、右边甚至看不到之后这时添加如下代码来解决:
...
if( pos.x + radius > movie.width ) {
pos.x = movie.width - radius;
vel.x *= -_root.restitution;
}
if( pos.x < radius ) {
pos.x = radius;
vel.x *= -_root.restitution;
}
...
(2)让小球在舞台上指定的位置来回跳动
// Has the ball left the bottom of the stage?...
if( pos.y + radius > movie.height ) {
pos.y = movie.height - radius;
vel.y *= -_root.restitution;
vel.x *= _root.friction;
}
到此动画就出现了!希望您能学到知识,那我就感到欣慰了!
首先看一下效果吧!鼠标可以拖拽小球到别的位置然后放开,或用鼠标把小球扔了:
[附件:源文件下载]
制作过程说明:
1.设置场景,首先我们建立一个400 x 300的文档,然后在文档的中央位置绘制一个大小适宜的正圆。如下图所示:

2.首先我们先初始化几个变量,他们分别是:gravity, restitution 和 friction,并且把下面的代码添加到时间轴的第一桢:
var gravity:Number = 1.2;
var restitution:Number = 0.6;
var friction:Number = 0.9;
stop();
3.然后我们对小球进行设置,首先把小求转变为一个组件,类型选择影片剪辑,名称为:Ball_MC。然后为这个影片剪辑实例添加如下代码:
onClipEvent(load) {
var vel:Object = { x: 0, y: 0 };
var pos:Object = { x: _x, y: _y };
var old:Object = { x: _x, y: _y };
var radius:Number = this._width / 2;
var movie:Object = { width: 400, height: 300 };
var dragging:Boolean = false;
}
4.我们添加如下代码来控制小球的移动
onClipEvent(enterFrame) {
vel.y += _root.gravity;
pos.x += vel.x;
pos.y += vel.y;
// 现在来更新小球的实际位置...
_x = pos.x;
_y = pos.y;
}
5.当小球在按钮的范围,被拖拽并松开时,小球就可以蹦了!加上如下代码:
// Has the ball left the bottom of the stage?...
if( pos.y + radius > movie.height ) {
pos.y = movie.height - radius;
vel.y *= -_root.restitution;
}
6.为了让鼠标的动作更加真实,比如你可以用鼠标任意拖拽小球,我们要稍微修改一下Ball_MC元件。在舞台上选择小球实例,然后按Ctrl+E来编辑实例,并且设置为黄色,然后转变为一个按钮元件Ball_Button,然后给按钮添加如下代码:
on(press){
startDrag(this,false,16,16,384,284);
dragging = true;
}
on(release, releaseOutside){
stopDrag();
dragging = false;
}
为了能让动画更加具体我们需要设置一个变量dragging来保持小球被拖拽的轨迹,代码如下:
onClipEvent(enterFrame) {
if(!dragging) {
// Actions to apply gravity here...
}
}
为了使动画更加真实,我们需要增加上述的代码的功能,以使我们能在舞台上任意拖拽并扔小球。
onClipEvent(enterFrame) {
if(!dragging) {
// Actions to apply gravity here...
} else {
old.x = pos.x;
old.y = pos.y;
pos.x = _x;
pos.y = _y;
vel.x = ( pos.x - old.x ) / 2;
vel.y = ( pos.y - old.y ) / 2;
}
}
7.另外我们还有2个问题要解决:(1).我们扔小球到左边、右边甚至看不到之后这时添加如下代码来解决:
...
if( pos.x + radius > movie.width ) {
pos.x = movie.width - radius;
vel.x *= -_root.restitution;
}
if( pos.x < radius ) {
pos.x = radius;
vel.x *= -_root.restitution;
}
...
(2)让小球在舞台上指定的位置来回跳动
// Has the ball left the bottom of the stage?...
if( pos.y + radius > movie.height ) {
pos.y = movie.height - radius;
vel.y *= -_root.restitution;
vel.x *= _root.friction;
}
到此动画就出现了!希望您能学到知识,那我就感到欣慰了!
- 上一篇: 教你用AS快速画出简单实用的菜单
- 下一篇: 创建鼠标光标的形状实例
-= 资 源 教 程 =-
文 章 搜 索
